How to Enable Data Enrichment for HubSpot CRM with EnrichHQ by Marcom Robot
In this step-by-step integration guide, you'll learn how to enable data enrichment, business email and phone number validation for HubSpot CRM with EnrichHQ.
Integrations steps:
Looking for HubSpot data enrichment? You're at the right place. This step-by-step guide explains how to integrate EnrichHQ with HubSpot CRM. If you run into an issue and need assistance setting up HubSpot enrichment, please contact the Marcom Robot Team, and we’ll be in touch with you shortly.
Prerequisites
There are several things that you'll need to integrate EnrichHQ with your HubSpot CRM:
- A Marcom Robot account with EnrichHQ product activated (any plan - free and paid)
- A HubSpot account (any plan)

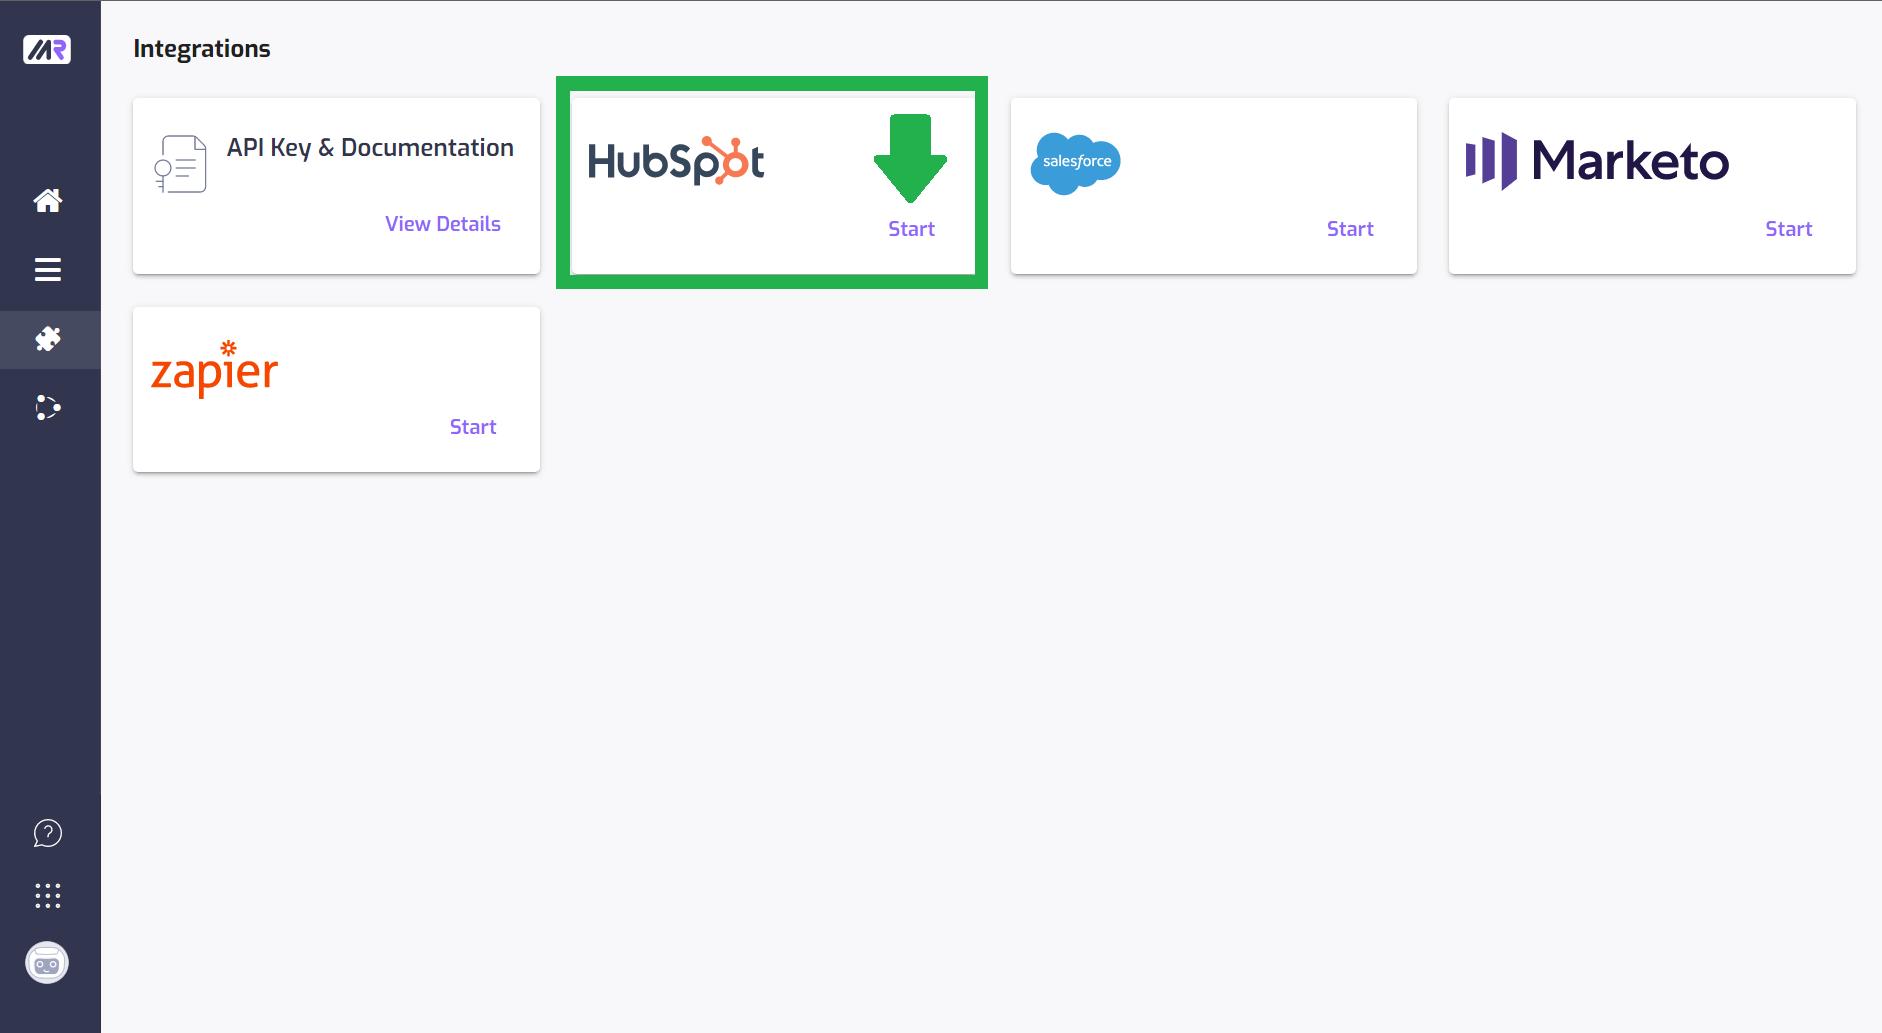
Step 0: Start the HubSpot integration
To get started with the integration, log in to EnrichHQ and click the "Integrations" item in the main menu. Then click "Start" on the HubSpot card.
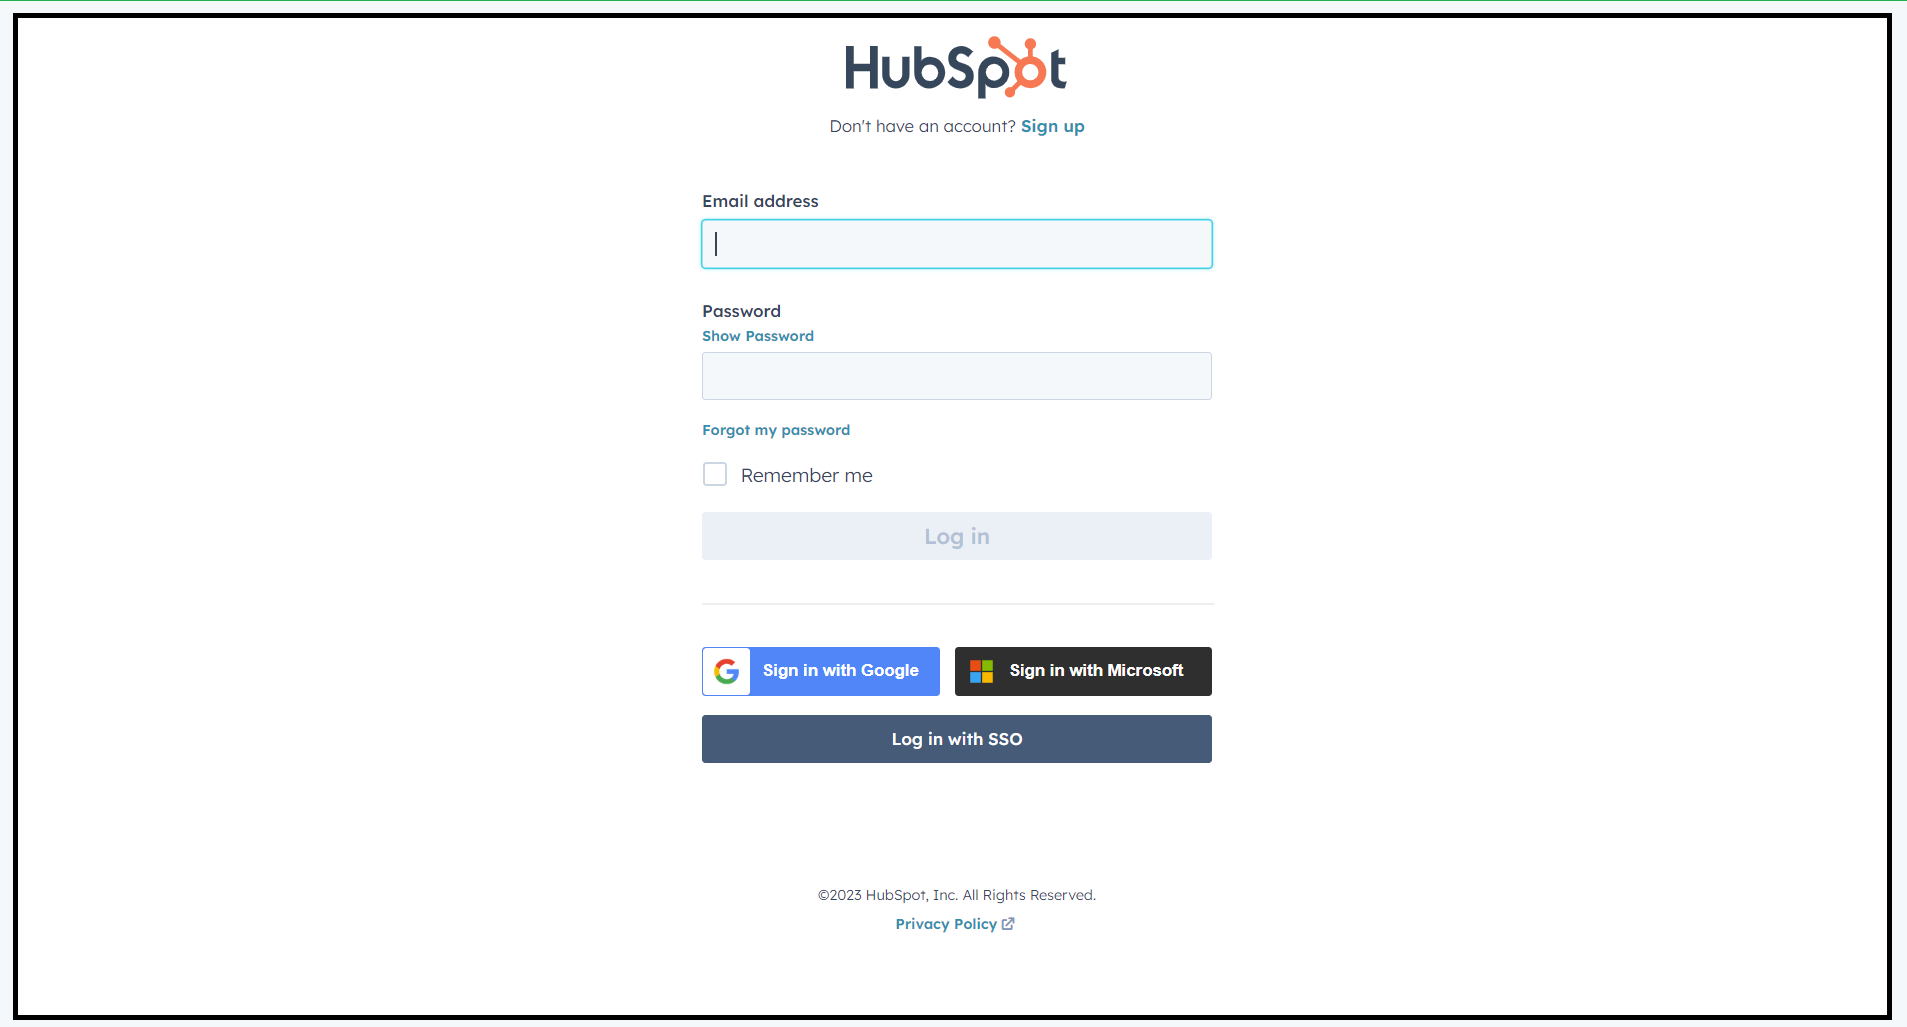
Step 1: Install EnrichHQ app
The first thing that you'll need to do is install the official EnrichHQ Application in your HubSpot instance. To do that, please click the "Install App" button.

After you've clicked the "Install App" button, you'll automatically be prompted to log in to your HubSpot instance to complete the installation of EnrichHQ application. Please go ahead and do that, and proceed to the next step.
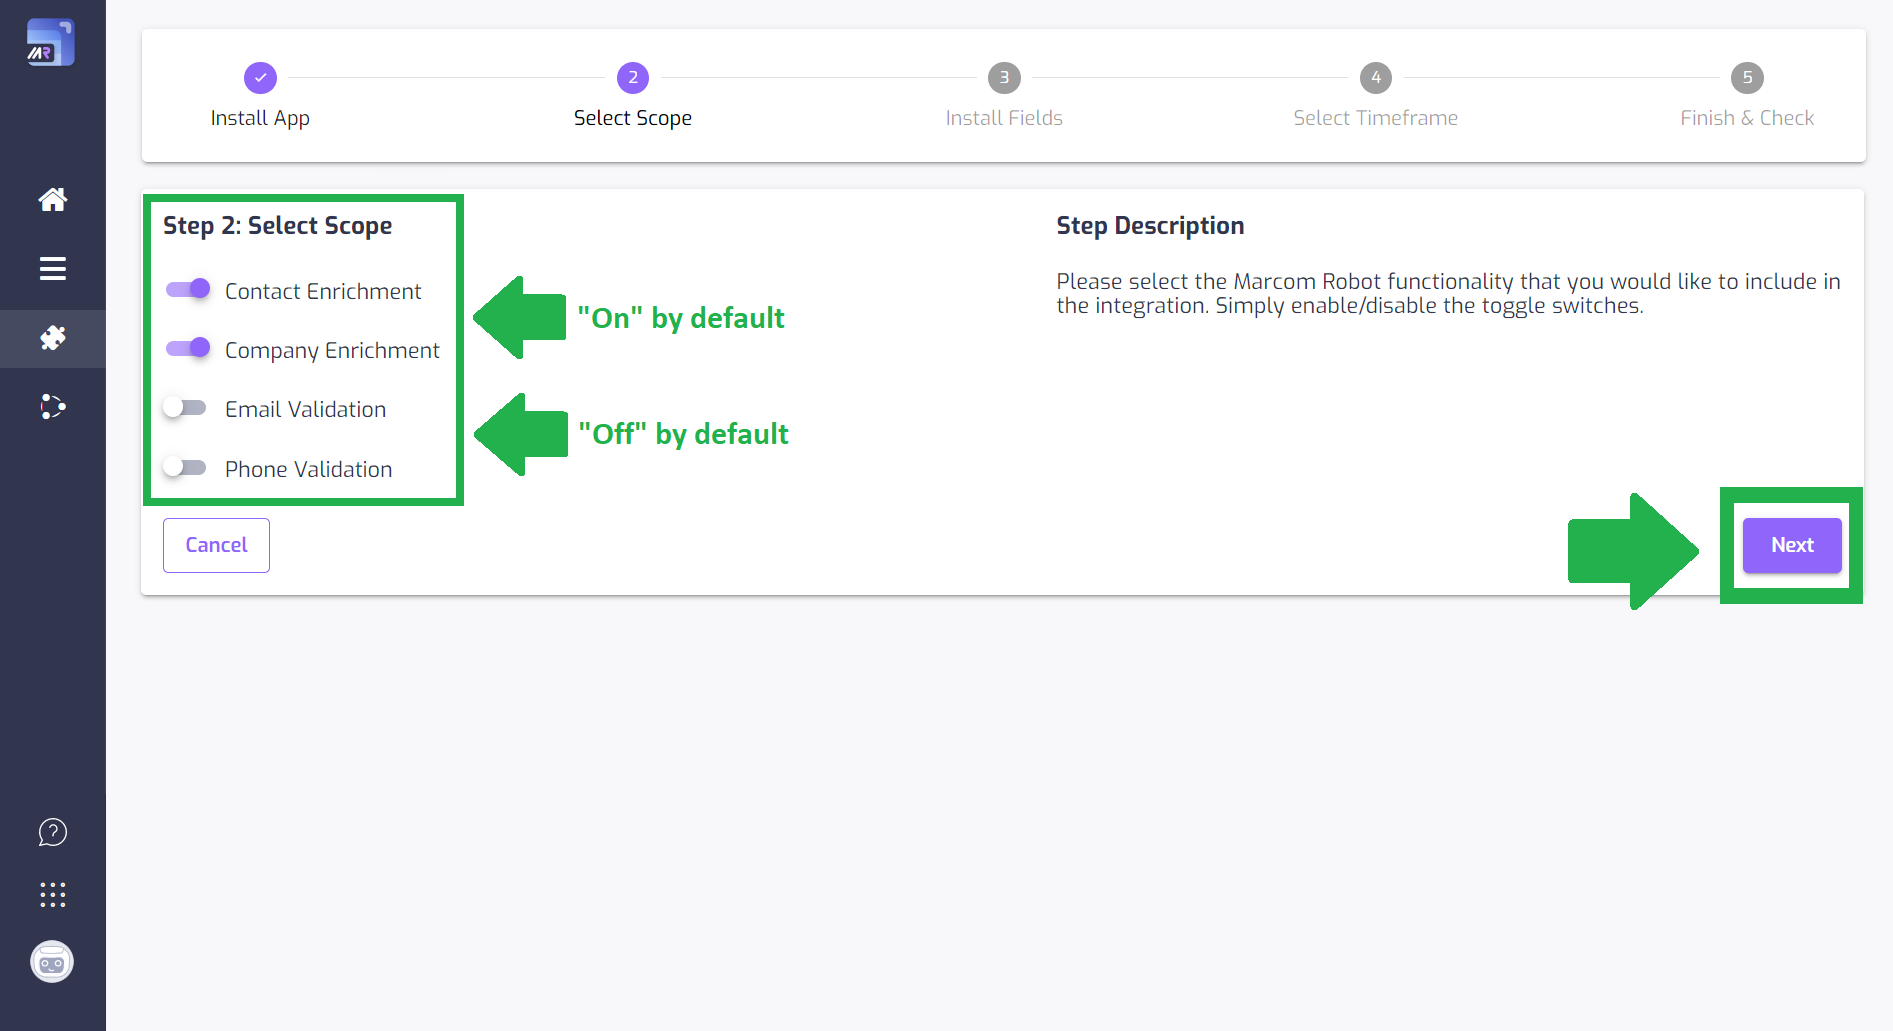
Step 2 : Select enrichment scope
The second thing that you need to do is select the scope of the integration. EnrichHQ not only can enrich your HubSpot contacts and companies, but also verify email addresses and phone numbers of your HubSpot contacts. By default, the "Email Validation" and "Phone Validation" options are turned off. Feel free to enable them if you'd like. It's totally up to you. Once you've made your mind, click "Next" and proceed to the next step.
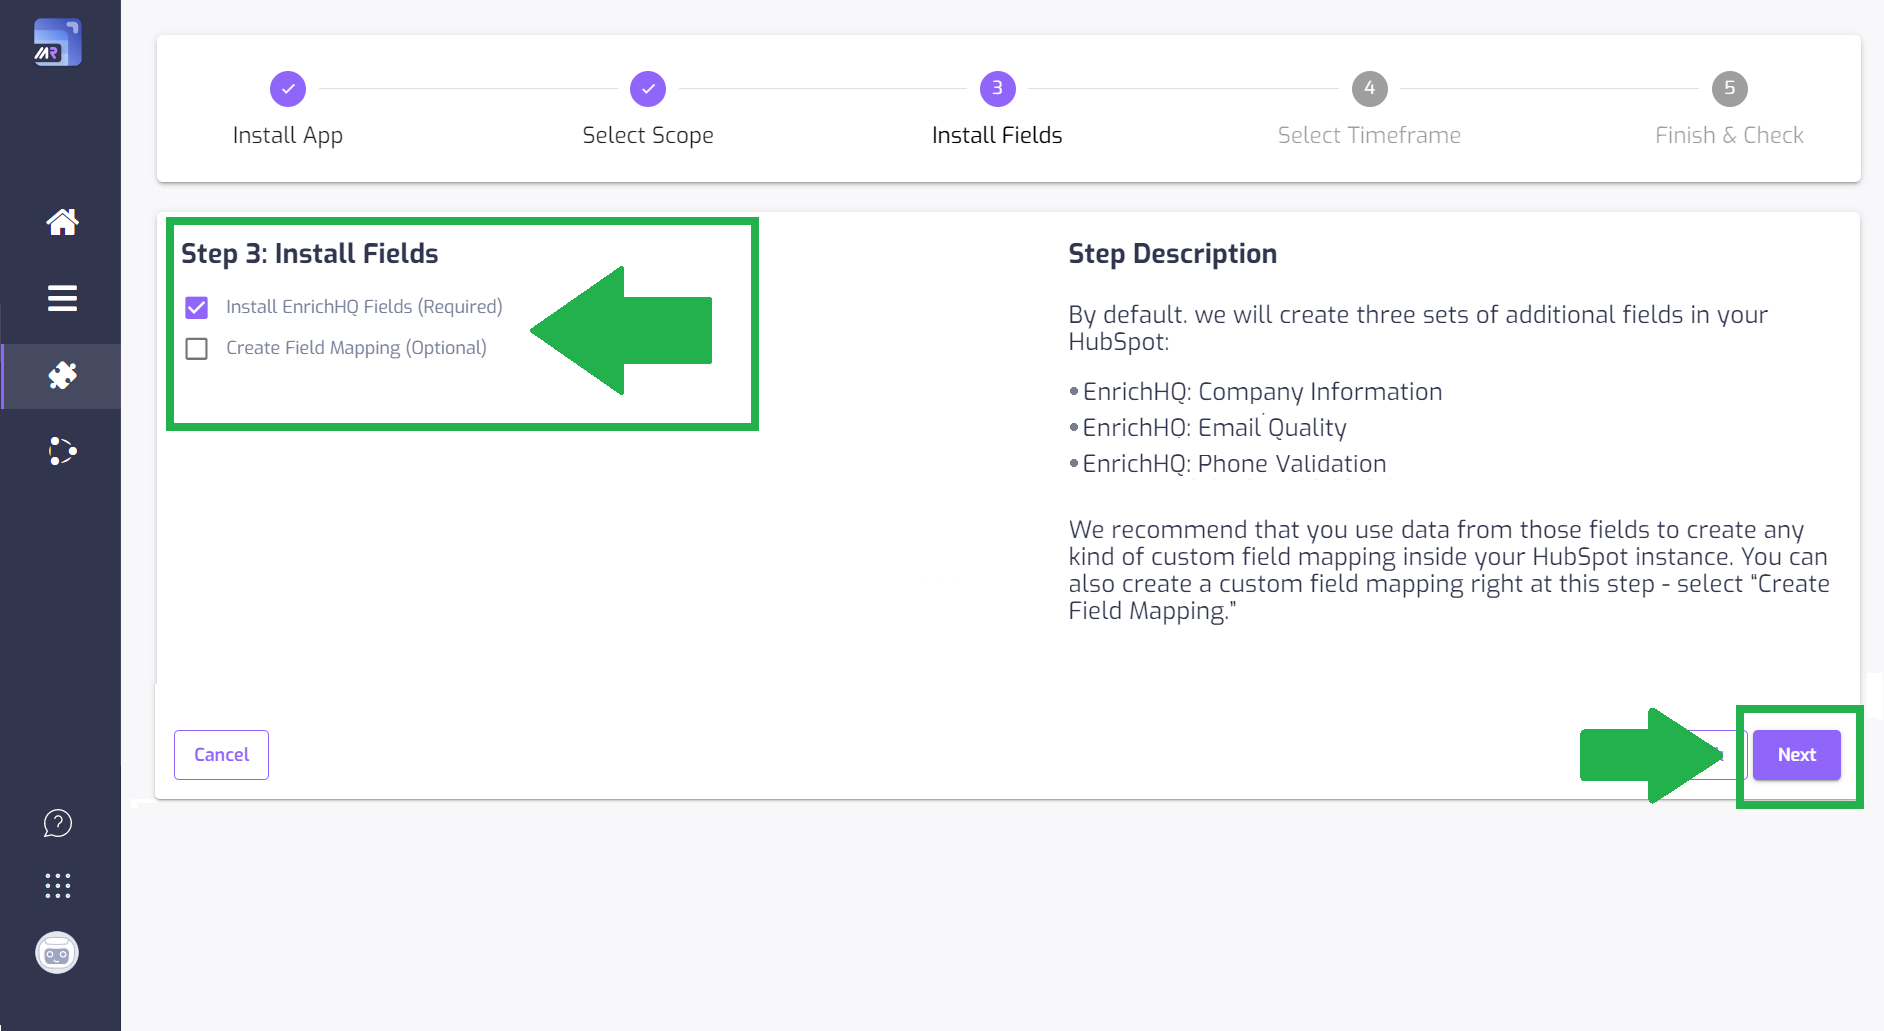
Step 3: Install EnrichHQ fields
On the third step of setting up the integration, you'll need to simply click the "Next" button, and we'll automatically create all of the additional fields in your HubSpot instance. These are the fields, where we'll store the enriched information. In your HubSpot instance, you can create rules that will be copying this information into any fields you want.
If you don't want to do that later in your HubSpot, you can do it right on this step by checking the "Create Field Mapping (Optional)" box. You'll see the full list of the fields and be able to map them to the fields where you want the certain data points be stored. Please note this is an optional step.
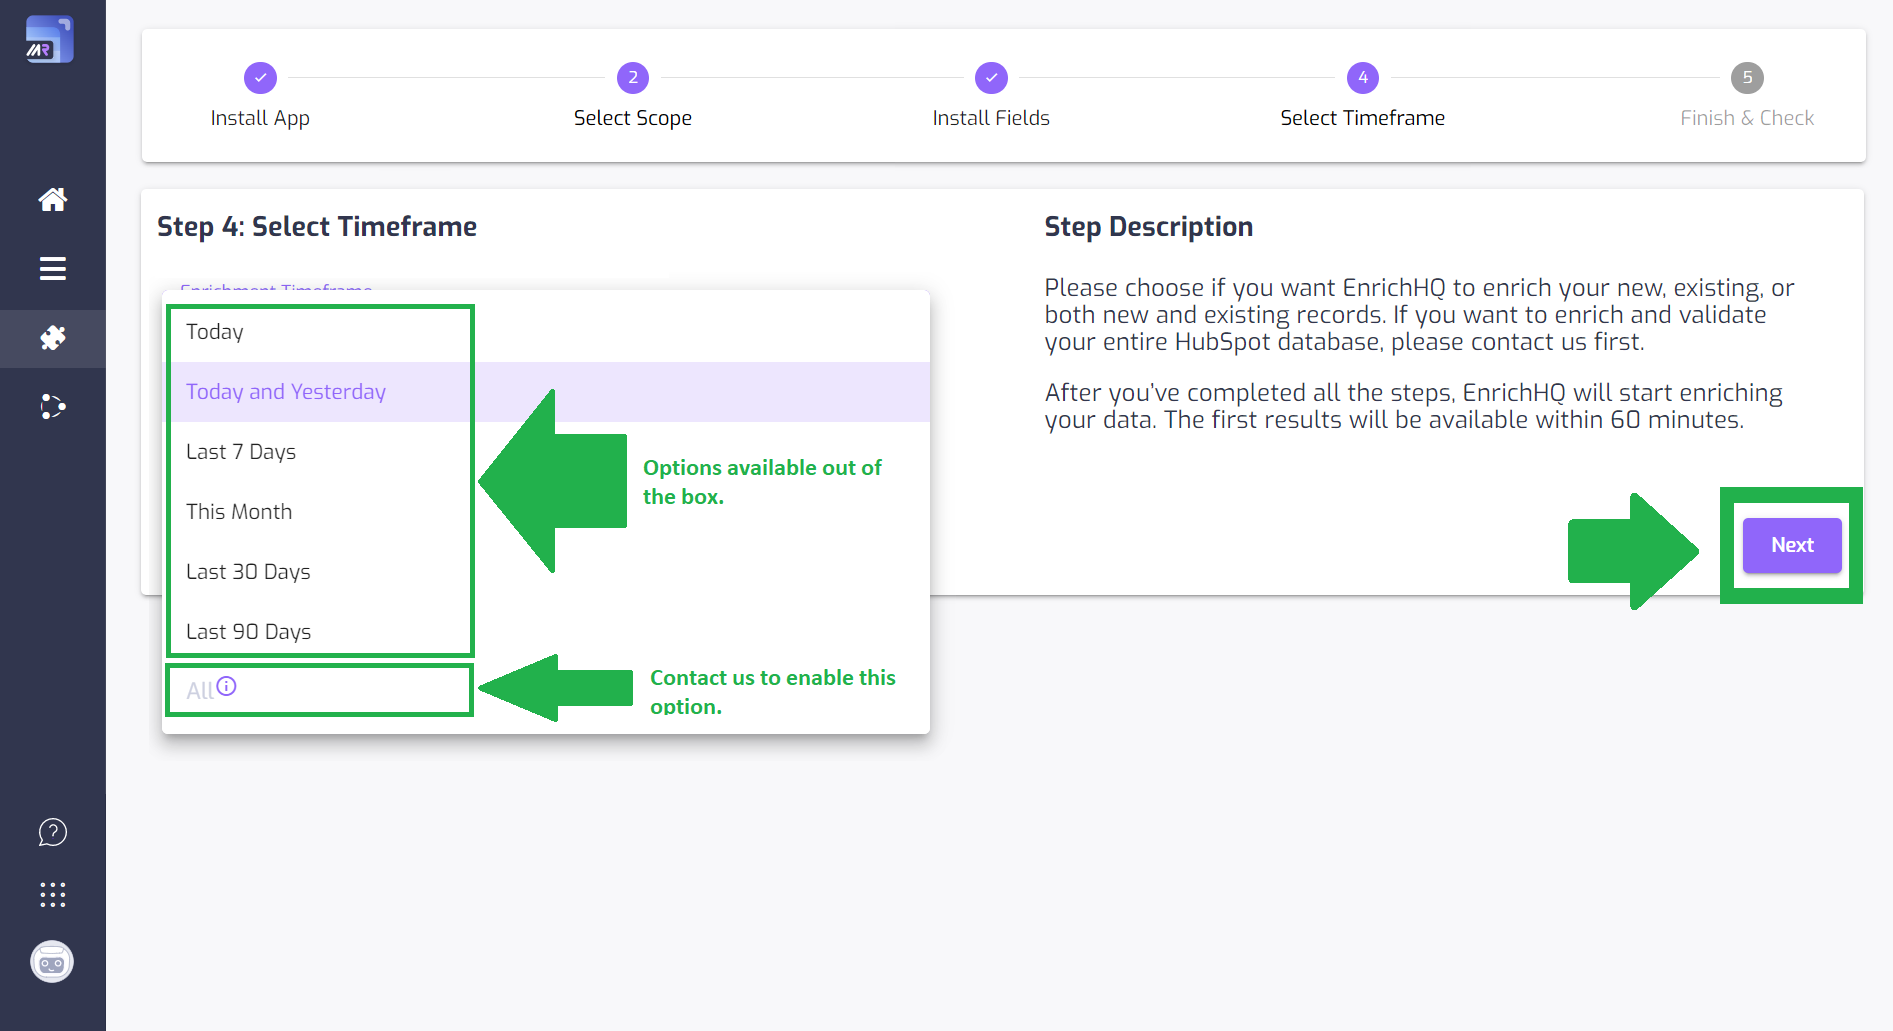
Step 4: Select enrichment timeframe
You're almost done - the last thing that you need to do is select the "Enrichment Timeframe" - do you want EnrichHQ to enrich only recently created contacts and companies, or old records as well? Go ahead and make your selection.
Important: If you want to enrich your entire database, or have a unique timeframe in mind, please contact us first. The point of contacting us is so that your team and our team could check how many daily API calls you have with your HubSpot account, and make sure this this number will not get exceeded by EnrichHQ.
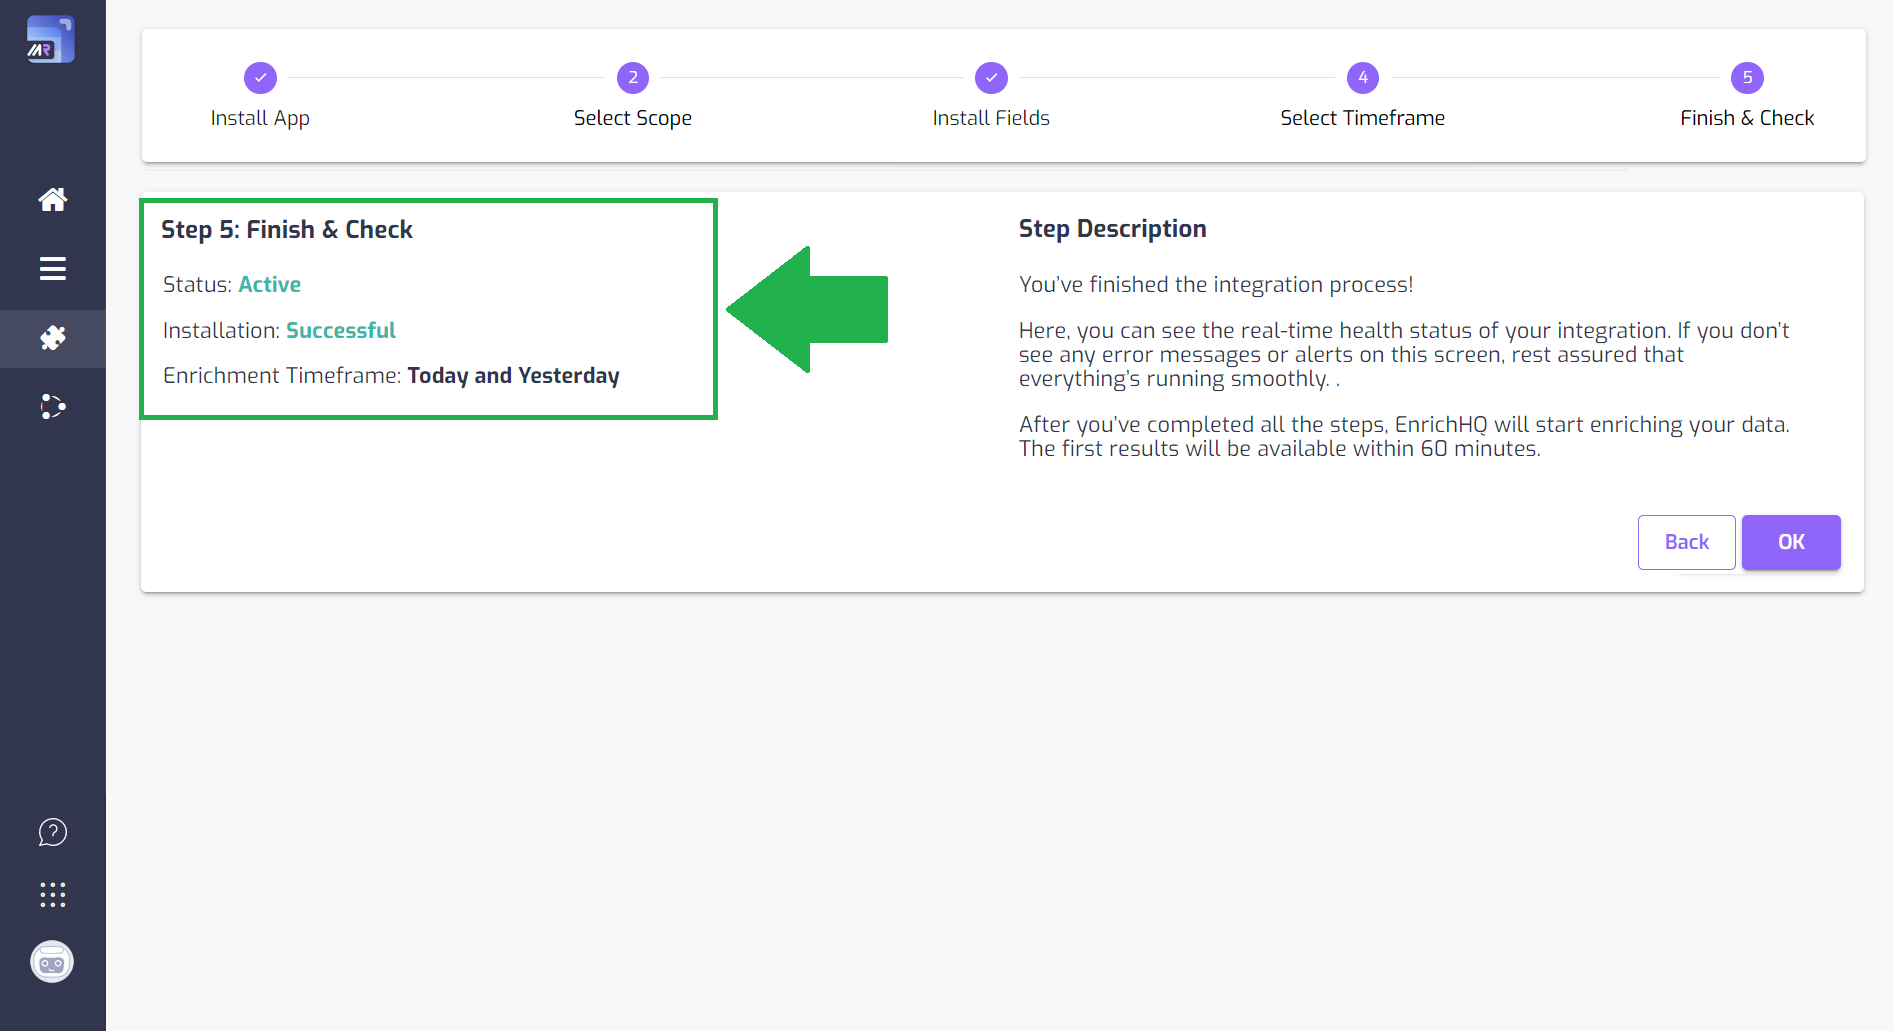
Step 5: Finish & check the integration
Congratulations! Your integration between EnrichHQ and HubSpot has been completed successfully! If you followed all the steps, you should be all set.
How to ensure your integration's been set up correctly:
- "Status" field shows "Active"
- "Installation" field shows "Successful"
- You don't see any error messages
Important: After you’ve completed all the steps, EnrichHQ will start enriching your data. The first results will be available within 60 minutes.


.png)
.png)
.png)
.png)


.jpg)


.jpg)


.jpg)
.jpg)


