Custom Domains
PagePro allows you to connect your custom domain where you can publish your landing pages for stronger brand alignment, security and compliance.
In this article:
- How to connect a custom domain to PagePro
- Part I: Add your custom domain to PagePro’s “Domains” section
- Part II: Add a CNAME and TXT records with a domain hosting provider
- Part II: Practice patience while the systems are being connected
- How PagePro makes your landing pages secure and compliant
- Example: How to add your CNAME and TXT records with GoDaddy
- Example: How to create your CNAME and TXT records with Google
When you’re just getting started with PagePro, all of your landing pages will be hosted on a default domain “marcomrobot.page”. This domain is for illustration purposes only. While you can create and publish your landing pages on it when you’re testing out the product, we don’t recommend using it for paid advertising or other types of demand generation programs.
Connecting your custom domain to PagePro is one of the best practices that, in our humble opinion, everyone who’s serious about landing page making should follow. The good news is that it’s not rocket science, and it takes minutes, not days to set everything up properly.
How to connect your custom domain to PagePro landing page builder.
Let’s start with a few prerequisites — things you’ll need to have in order to connect your custom domain to PagePro
- Your custom domain which you own
- Administrative access to your domain with your domain hosting provider
- Administrative or Owner-level access to your PagePro account
Here are the precise steps that you need to follow to have your custom domain connected to PagePro:
- Part I: Add your custom domain to PagePro’s “Domains” section [~5 minutes]
- Part II: Create your CNAME record with your domain hosting provider [~10 minutes]
- Part III: Practice a little bit of patience, while the systems get connected — the ball’s not in our court [~up to 24 hours].
Once your custom domain has been connected successfully, you’ll need to adjust the URLs of the landing pages which you’ve built before connecting your domain.
Part I: Add your custom domain to PagePro’s “Domains” section.
The very first step in the process of connecting your custom domain to PagePro is adding it to the “Domains” section. This is ultra-easy to do. Just follow these steps:
Step 1: Log in to PagePro as an account “Admin” or “Owner”.
Step 2: On the left-hand side menu, locate the “Settings” item and click to expand it
Step 3: Locate the “Domains” subitem and click it. The “Domains” section will open.
Step 4: While on the “Domains” section, click “Add New Domain”
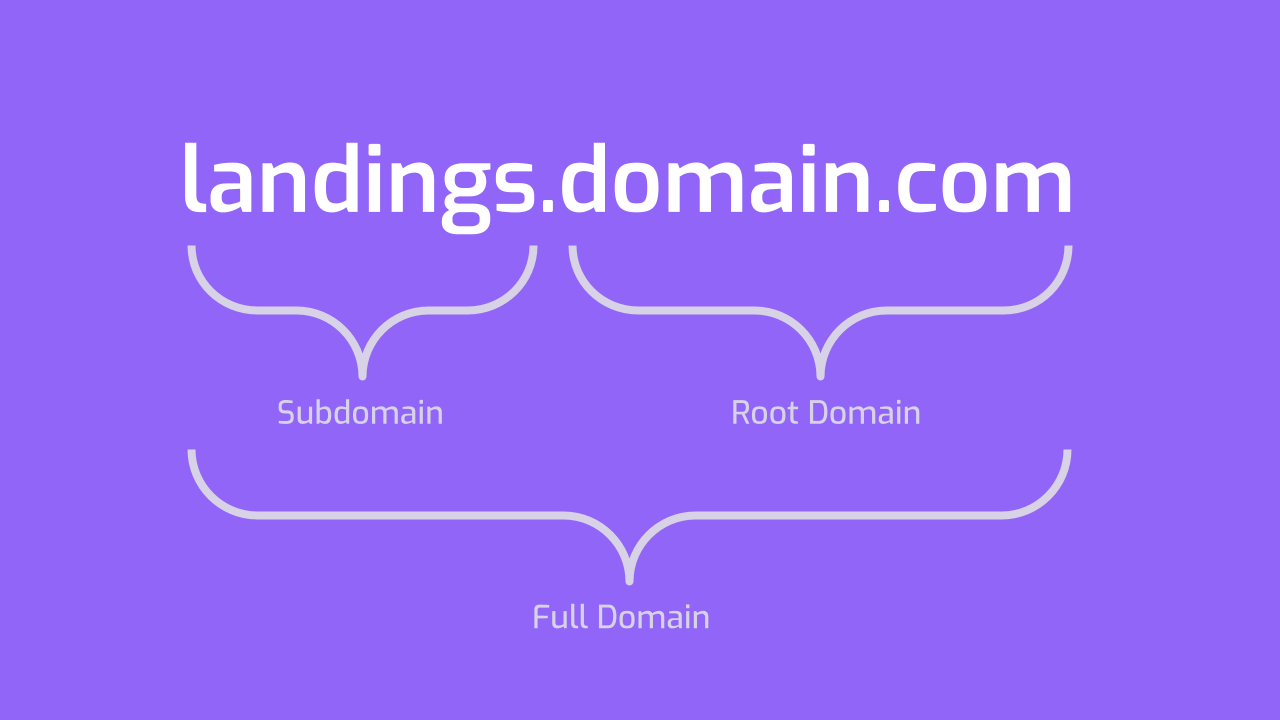
Step 5: In the “Root Domain” specify the domain where your landing pages will be hosted. Root domain must not include “www” or subdomain and should look like this —domain.com.
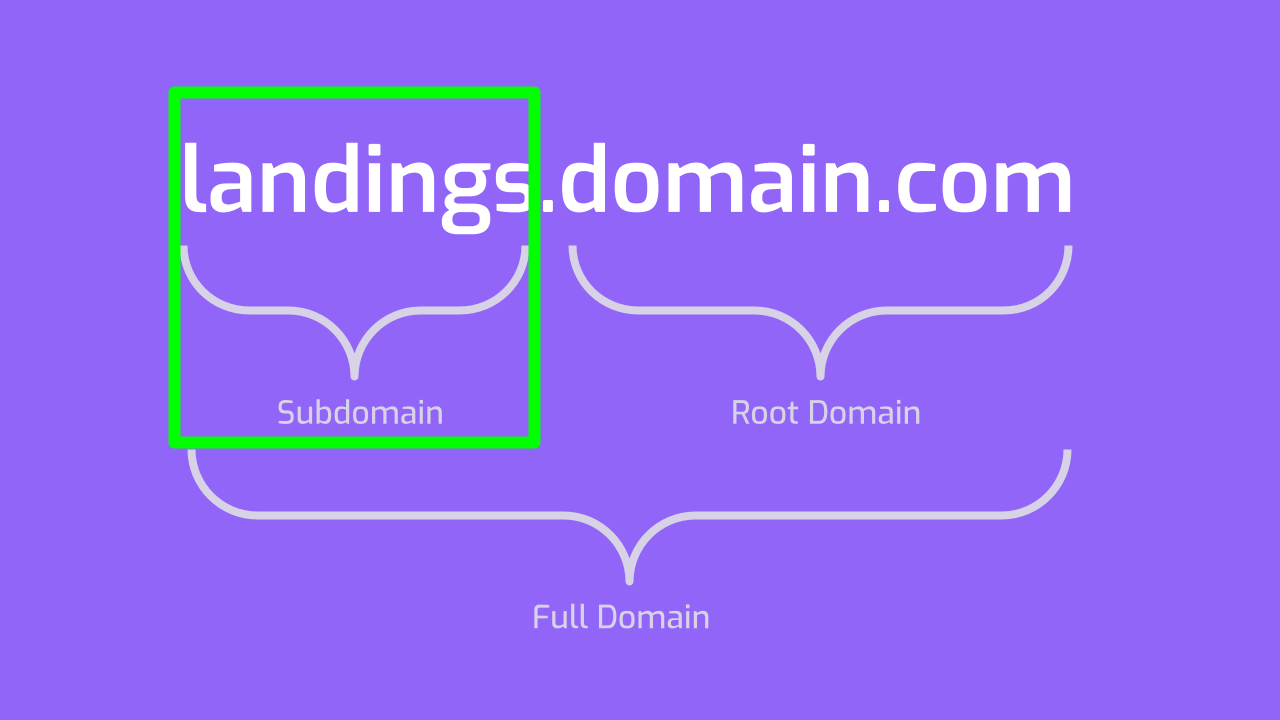
Step 6: In the “Subdomain”, specify your subdomain. It’s typically what stands before your root domain.
If you already have an active website hosted on your root domain (e.g. www.domain.com), you’ll need to use a subdomain to host your your landning pages created with PagePrp (e.g. landings.domain.com). In this example, the word “landings” in front of your root domain is the subdomain.
The reason for this is that you can’t place your active website and landing pages in the same domain. The most popular subdomains for landing pages are promo.domain.com, try.domain.com, start.domain.com, trial.domain.com. You can use any subdomain that you like.
If you don’t have an active website hosted on your root domain, you can use your root domain (e.g. www.domain.com) for the landing pages you've built with PagePro.
Step 7: Click the “Add New Domain” button. The “Part II” screen will appear.
Part II: Add CNAME and TXT records with your domain hosting provider.
Whether you’ve decided to go with a subdomain or root domain it’s time to tell your domain hosting provider to route all traffic visiting this the domain of your choice to landing pages created with PagePro.
For this part, you’ll need administrative access to your domain with your domain hosting provider. If you don’t have this level of access, ask your IT or website development teams to help out.
Step 8: Log in to the domain provider for your root domain (e.g. domain.com) and navigate to “DNS Settings” or “DNS Management”, or similar types of settings.
Step 9: Add a "CNAME" record for your subdomain (e.g. landings) and paste the following so it points to: "front-proxy.marcomrobot.com"
Step 10: Add a "TXT" record for @ and paste your unique value (you’ll see it once you’re following this process in the product).

Part III: Practice a little bit of patience while the systems get connected — the ball’s in our court.
You’re almost done! Now that you’ve completed Part I and Part II, you’ll see the “In Progress” message in the “Status” field in the “Domains” section of PagePro. This means that the ball is in our court as we’re checking the domain settings and verifying the connection with your domain hosting provider. This process may take anywhere from one hour to 24 hours.
Once we’re done and your domain has been successfully verified, you’ll see the “Verified” message in the “Status” field. Also, you’ll get notified via email as soon as your domain is verified.
If for whatever reason, the verification fails, you’ll see the “Verification Failed” message in the “Status” field. This means that one, some or all of the settings were configured incorrectly. Please try to follow the domain setup instructions once again. If you’re still having issues connecting your custom domain to PagePro, please contact us and we’ll help out.
Long story short, the SSL technology keeps an internet connection secure, preventing criminals from reading and modifying any information transferred, including personal data.
Though regulations such as GDPR (General Data Protection Regulation) do not contain any specific section on the use of SSL certificates, GDPR has clear requirements that can only be addressed through the use of SSL certificates.
How to add your CNAME and TXT records with GoDaddy
Step 1: Log in to your GoDaddy account and navigate to the “Domain Settings” section.
Step 2: Scroll down to the “Additional Settings” section and click “Manage DNS”.

Step 3: On the “DNS Management Page” you’ll see the “Records” list — click the “Add” button.

Step 4: Select the “CNAME” type from the dropdown menu.

Step 5: Fill in the fields of the “CNAME” form with the following information:
Host: Type in the subdomain you’ll want to use for your custom domain (e.g., if your custom domain in PagePro is landings.marcomrobot.online, type “landings” in GoDaddy).
Points to: Type in “front-proxy.marcomrobot.com” in this field.

Step 6: Click “Save”.
Step 7: Once the “CNAME” has been added to your “DNS Settings”, go ahead and click “Add” one more time.

Step 8: Select the “TXT” type from the dropdown menu

Step 9: Fill in the fields of the “TXT” form with the following information:
Host: Type in the “@” sign.
TXT Value: Type in your unique “Value” for the “TXT” record, which you can find in the Part II of the process of adding your custom domain in PagePro.

Step 10: Click “Save”.
Congratulations! You’ve successfully finished adding your custom GoDaddy domain to PagePro. Please note that it could take up to 48 hours for newly-created records to propagate.
How to create your CNAME and TXT records with Google
Step 1: Log in to your Google Domains account and click the “DNS” settings tab.

Step 2: In the “Custom records” section, select the following values:
- Host Name: Type in the subdomain you’re planning to use for your landing pages, e.g. “landings”. If you're planning on using your naked domain, type “www”.
- Type: Select “CNAME” in the “Type” dropdown list.
- TTL: Select “1H” in the “TTL” dropdown list.
- Data: Paste “front-proxy.marcomrobot.com”.

Step 3: Click “Create New Record” and select the following values:
- Host Name: Type in the subdomain you’ve entered on the previous step.
- Type: Select “TXT” in the “Type” dropdown list.
- TTL: Select “1 hour” in the “TTL” dropdown list.
- Data: Type in your unique “Value” which you can find in the Part II of the process of adding your custom domain in PagePro

Step 4: Click “Save”.
Congratulations! You’ve successfully finished adding your custom Google domain to PagePro. Please note that it could take up to 48 hours for newly-created records to propagate.

.png)
.svg)

.png)
.png)
.png)
